 Tattoo Stencil
Design notes
Compare the total span and the rise of the central flower to see how the curved outline fits the available area.
Artwork source
Vector line art from the Tattoo Stencil collection.
 Buy me a coffee
Botanical · Tattoo stencil design
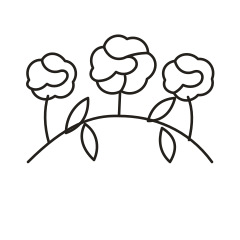
An arcing branch with a centered rose and smaller flower shapes near either end.
Compare the total span and the rise of the central flower to see how the curved outline fits the available area.
Vector line art from the Tattoo Stencil collection.
The middle rose rises above the outer pair, and the low curved stem ties them together. This silhouette works well for a paper comparison across a wide space, where the shape can be centered around the tallest bloom. Mark that bloom on the paper first, then compare the room left for the outer flowers. The leaves above and below the stem create a second, smaller rhythm, which is easy to overlook if you judge only the width across the petals.
Compare a level proof with the same proof tilted a few degrees. Check whether one outer flower pulls too far from the group and whether the curved stem still reads as a single line. On a reduced print, focus on the small inner petal where each outer bloom meets its short stem. If those junctions get hard to read, give the flowers more room in the draft or simplify one inner fold on each side. Keep the small variations between the two outer roses so the arch still feels drawn.
Use the arch as a wide paper mockup for an area such as the upper chest or upper back. Start by marking the midpoint and the height you want for the middle bloom. Then check whether the two outer flowers have room when the stem ends sit at the intended level. If one end crowds the boundary, move the whole paper cutout or choose a shallower angle. Reducing it straight away would also shrink the spaces between the three blooms.
Set the reference and the proof next to each other in the same orientation. Start with the outline and cover the smaller marks with a separate sheet for a moment. That makes it easier to tell whether a detail is doing important work or only adding texture. Uncover the rest, then note the first detail that looks different between the two copies. Write down whether it disappeared, joined another mark, or shifted in relation to the main shape. These observations give you a way to compare the next draft without relying on the appearance of the zoomed preview.
Notice how the two leaves on each side of the central branch sit on opposite sides of the curved stem. The silhouette depends on those paired directions. At a smaller size, inspect where an inward-facing leaf comes closest to its neighboring short flower stalk. Compare a version that trims the leaf tip with one that omits the smallest petal crease above it. Keep the curved stem continuous in both versions so the three flowers still belong to one arrangement.
Follow the line from the tip of the flower or leaf to the end of the stem. Where petals overlap, decide which edge describes the front petal. If both edges merge in the proof, keep the stronger boundary and try a simpler version of the smaller fold. Leave the outline in proportion.
Use a ruler across the two ends of the printed arch and confirm the center flower rises above that reference line. Then check the lower interior of the central bloom, where a short fold approaches the bottom edge above the stalk. If the fold and edge merge, print a second copy with the short fold removed and compare both side flowers at the same scale. The center should still lead the composition without requiring you to redraw the outer blooms.
If the artwork spans more than one page, align the repeated lines in the overlap first. Look at both a long edge and a small detail that crosses the seam. A small offset can change the spacing in a detailed section even when the outer edges appear to line up. Assemble the pages and measure the overall width or height again. The actual-size printing guide walks through calibration and assembly.
Pick one feature that makes left and right easy to distinguish and use it to label the proof. A curved stem, an unequal wing, or a letter can serve as the reference point. Check which direction the equipment produces before choosing the mirror option for a working stencil. A paper proof can help you discuss scale and orientation with an artist. Keep the original image, the chosen draft, the measured dimensions, and any alternate version that shows a detail you removed. If you return to the design later, those files make it possible to see which decision you made without reconstructing the settings from memory.